page list

Showing posts with label gluten-free. Show all posts

Monday, September 10, 2012

Easy Baked Apple Recipes

With Fall fast approaching, baked apple and pumpkin dishes are sounding so good to me right now! I decided to focus on apples first and have come up with a couple of delicious, easy and satisfying recipes for anyone doing a Whole30, eliminating sugar from their diet or just simply loves the comforting goodness, warm baked apples have to offer.

You don't need me to remind you all of the nutritional benefits of eating a whole food like apples right? I mean, you probably already know all about the terrific soluble fiber, vitamin A, iron and calcium that is present in baked apples...of course you do...whew, glad I don't have to explain :)


Baked Spice Apples with Coconut Cream

Serves 1

2 small baking apples (I used Granny Smith) sliced into 8 wedges each, preferably peeled (I did not peel mine, too lazy)
1 Tbsp of melted Ghee or butter (I used ghee)
1/2 tsp of Pumpkin Pie spice or Apple Pie spice (I used pumpkin pie spice)
pinch of sea salt
1 Tbsp of Coconut Cream* (or as much as you want)
Optional: chopped nuts

1. Preheat oven to 400 degrees.

2. Add your apple wedges to a 8x8 baking dish.

3. Drizzle melted ghee or butter over the apples.

4. Add Pumpkin Pie spice or Apple Pie spice and sea salt to the apples.

5. Stir apples together with the spices and ghee to coat.

6. Bake uncovered for 30 minutes or until for tender or as soft as you like.

7. Add baked apples to serving bowl, top with coconut cream and nuts if you are using.

8. Enjoy!

*To get coconut cream, put a can of full fat coconut milk in the fridge for 24 hours (sometimes overnight is not long enough to harden the cream). Open can and scoop out with a spoon the white coconut cream that has solidified in the can. Whisk cream in a bowl till nice and creamy and smooth.

If you are not on a sugar detox of some sort and feel the apples themselves are not sweet enough for you, add a little maple syrup or raw honey before topping with the coconut cream.


Baked Cinnamon Apples and Wild Blueberries

Serves 1


2 small baking apples (I used Granny Smith) sliced into 8 wedges each, preferably peeled (I did not peel mine, too lazy)
1 Tbsp of melted Ghee or butter (I used ghee)
1/4 tsp (rounded) of Cinnamon
About 4 swipes on a rasp of whole nutmeg or a good pinch of powdered nutmeg.
1/4 Cup of frozen, wild blueberries (Trader Joe's has some), I'm sure regular blueberries will work just fine
pinch of salt
Optional: Coconut cream, nuts

1. Preheat oven to 400 degrees.


2. Add your apple wedges and blueberries to a 8x8 baking dish.

3. Drizzle melted ghee or butter over the apples.

4. Add spices and salt to the apples and blueberries.

5. Stir with a spoon to coat fruit with spices and ghee.

6. Bake uncovered for 30 minutes or until for tender or as soft as you like.

7. Add baked fruit to a serving bowl and top with nuts or coconut cream or both.

8. Enjoy!

If you are not on a sugar detox of some sort and feel the apples themselves are not sweet enough for you, add a little maple syrup or raw honey before adding your toppings.

Other topping ideas are:

shredded coconut
yogurt
dried cherries
dried cranberries
raw honey
maple syrup
Caramel Sauce-homemade and without High Fructose Corn Syrup
Coconut Nectar
Brown Rice Syrup

Or you can make the Baked Apples a topping for:

Vanilla Ice Cream
Yogurt
Oatmeal
Porridge
Pork or other meat
Baked sweet potatoes

However you decide to eat these baked apples, I hope you find it yummy!

Steph

Monday, August 6, 2012

Book Review and Giveaway of Practical Paleo By Diane Sanfilippo

This giveaway is now closed.

The winner of the Practical Paleo Book is: Eileen Lindsey!


"What is paleo? "Paleo" is short for Paleolithic, but the name is actually less important than the power of the overall approach.
While the term "Paleo" has gained traction in the mainstream media and on bookstore shelves everywhere due to the improved health of those who follow the lifestyle, you could call it "Primal", "Grain Free", "Real Food", "Whole Food", "Nutrient-Dense", or "Ancestral". Whatever name you choose, the "Paleo" way of eating is simple: Mimic our Ancestors, who suffered from fewer chronic diseases than modern populations." Diane Sanfilippo  Pg. 22 Practical Paleo 

I feel so honored that my humble blog was chosen to receive an advanced copy of Practical Paleo by Diane Sanfilippo to review. I am so excited to share this book with you today, it truly is a treasure! I'm actually not really sure what to call this book, it's not just a book or a cookbook, it's both, wrapped up in a gorgeous, photo filled, information packed book! You know those authors who publish health books, then make you wait a year or more and publish a separate cookbook to go with their health book, well there is no waiting with this one, cookbook is included!

Her book is divided into three parts:

Part 1: The Why-Food and Your Body.

Part 2: Thirty Day Meal Plans

Part 3: Recipes


In part one, Diane explains the science behind the "Paleo" or as I like to call it the "Real Food" way of eating. She explains in detail and easy to understand terms why real food is best for our bodies. She includes colorful and extremely helpful guides and illustrations as well as many tips to help us when eating out or on an airplane or at a party.


Part two contains the meal plans. She has 11 different ones to choose from depending on your health issues:

Autoimmune Conditions

Blood Sugar Regulation

Digestive Health

Thyroid Health

Multiple Sclerosis, Fibromyalgia & Chronic Fatigue

Neurological Health

Heart Health

Cancer Recovery

Athletic Performance

Fat Loss

Squeaky Clean Paleo

Each meal plan contains Diet and Lifestyle recommendations, nutritional supplements & herbs to consider, supportive nutrients & foods that contain them and then the meal plans themselves. I personally plan to implement the Autoimmune Conditions, Thyroid Health and Fat Loss meal plans for my particular health issues.


Part three is all about the recipes! She includes step by step picture tutorials on how to chop an onion, how to chop a pepper and how to chop anything. I have found them tremendously helpful and am now chopping more like a chef than a crazy lady :) She has recipes for salt blends and spice blends that are wonderful. She has really inspired me to break out of the salt and pepper only mold and start using more of the spices in my cabinet!

The very best part of the recipes is that they are fast and easy to prepare with short ingredient lists for most...just how I like it!! Also each recipe has a least one gorgeous photo for you to drool at, taken by the talented Bill Staley of The Food Lovers Kitchen. I must stress the fact that this book, from start to finish, is chock full of glossy, beautiful photos...no skimping on that. I don't know about you, but I love looking at photos when I'm reading a cookbook or book on food.

Here are some of the recipes I have made from Practical Paleo...


This was adapted from her recipe Chicken Wings, two ways...

First my husband could only find regular size drumsticks at Costco instead of the recommended drummettes (or you can use wings too of course). Secondly I decided to only make it one way lol. I doubled the recipe for the Pineapple Teriyaki wings and boy was I glad I did...they were finger licking good! I really appreciated that there was no actual teriyaki sauce called for in the recipe, the combination of ingredients give you a delicious, lightly sweet sauce to mimic the teriyaki flavor without the harmful soy and sugar.


Pumpkin Pancakes...

Thank you, thank you Diane for giving the option to use a banana as a sweetener for these yummy, nourishing pancakes! This is a picture of my son's plate with the whole shebang of butter and maple syrup on top. Mine was just plain with butter, but still quite sweet that I did not miss the maple syrup.


The next day when heating up the leftovers for my breakfast, I had a great idea...drizzle on coconut butter. Let me tell you, it is so good this way, very decadent, but without the guilt!


Citrus and herb whole roasted chicken...

This was one of our favorites, so simple, yet full of flavor! The picture above shows the lemon version which my family just woofed down so fast. I saw my oldest son (aka pickiest eater) spooning extra roasted carrots and onion on to his plate, the lemon gave them so much flavor.

OK, I have to admit I goofed the first time I made this recipe, I used oranges instead of lemon, (I actually loved the orange version better) but I had set the chicken, breast down in the baking dish and proceeded to season and roast it upside down...it was still delicious and I ate some of the skin anyway :)

Upside down Orange chicken...live and learn :)


Lemon rosemary broiled salmon...

Wowie zowie, this is our favorite recipe so far! We all wanted to eat the whole thing in one fell swoop, but thanks to my husband, the voice of reason, we ate half the first night then enjoyed the other half the next night.

Lemon rosemary broiled salmon with sauteed zucchini, onion and kale


When I am finished with my sugar detox, I will be trying this recipe for Flourless mocha-bacon brownies...sounds and looks so good!


In the back of the book, Diane has guides that can be torn out and put on your fridge to help you remember important information.

My favorite guide was the one to paleo foods, I can get in a rut eating the same veggies over and over again, this guide helps remind me there are many vegetables and protein sources to choose from!

I hope my review was able to give you a good idea of what you will be getting if you purchase this "Encyclopedia" of information. It will arm you with the knowledge and tools you need to attain radiant health, which is what many of us are searching for.


This book will be released tomorrow, Aug.7th 2012!

Now for the giveaway! A brand spanking new copy of Practical Paleo will be mailed to the winner's doorstep!

"Like" my facebook page, Reading Your lips

"Like" Balanced Bites facebook page (Diane's page)

Post a comment below stating you have done both of these. The contest will be closed on Aug. 19th 2012 and the winner will be chosen and announced Monday, Aug. 20th 2012

**Update, I've changed the contest end date to Aug. 19th 2012

Good luck!

Steph

Monday, May 14, 2012

Making Lacto fermented Vegetables


I have been making my own lacto fermented vegetables for several months now, it's so easy! I will admit that I have wanted to make them for a very long time, but was too intimidated to try it thinking I was going to poison my whole family as well as my self. Along comes Ali and Tom from Whole Life Nutrition Kitchen with a blog post on how to easily make lacto fermented veggies, they even have a video for those who learn visually (me). After reading how easy it was, I decided to get brave and just do it. I enlisted my husband to watch the video with me and listen to all the instructions in case Tom covered information that was not explained in the blog post (it's all explained in the blog).  Next I purchased some wide mouth canning jars along with some plastic lids that go with them. Then I needed to determine what vegetables I was going to lacto ferment first. I chose carrots, cucumbers, bell peppers, cauliflower and red onions. I made six jars full of different combinations of vegetables and set them in a 9 x13 cake pan (to catch any fluid that comes out) and into my pantry. I left them for seven days to get "ripe" since it was still chilly during that time of year (if the weather is hot, it may take less time). After seven days, Eric and I pulled out our jars and tentatively tasted some of the veggies and they tasted delicious, even Eric was impressed! His favorite vegetable combination is red onion, cucumber and bell peppers (red, yellow and orange) and has since started adding some red pepper flakes when he makes some for himself.


I love Bubbies brand sauerkraut from the health food store, but it is a bit pricey if you eat a lot of it and I do. So I decided to try my hand at making my own with this recipe from Healthy Green Kitchen. I liked how she adds an apple for a little sweetness and her beautiful picture just looked so appetizing. I ended up using a green  apple in mine and I have to say that although it came out very good, I cannot detect any sweetness, most likely due to the green apple and not a red one as she uses.


Next, I tried my hand at some coconut mayonnaise using a recipe from The Coconut Mama. Instead of using whey, I used liquid from my lacto fermented vegetables and it came out so good, even Eric loved it. The kids could not tell it was made from healthy ingredients and I did not tell them :)


Eric and I have been eating our lacto fermented vegetables with almost every meal, they are so good and just teaming with enzymes and beneficial bacteria. Here are some of the ways I like to enjoy them.

baked potato with some ghee and lacto fermented veggies, I'm drooling!

brown rice pasta with homemade sauerkraut, so good believe it or not. I love it mixed in with brown rice too!

It's safe to say, I eat them with anything, I've even topped a homemade vegetarian pizza (after it was cooked) with my precious vegetables. I plan to try making some lacto fermented ketchup next!

I can't say for sure that my health has benefited from eating this way, but my doctor just recently lowered my thyroid medication by 30mgs, so I am going to keep doing what I'm doing.

What do you think? Are you interested in trying your hand at making some? I'd love to hear about it!

Steph

Update: I wanted to add some links that will offer more information on lacto fermenting

Nourishing Days has a series of posts on Fermented Food for Beginners (this link will take you the last post on the series, but that post will have links to the ones before).

According to Food Renegade, there is 54 billion live bacteria in less than a half a teaspoon of lacto fermented sauerkraut...wow! You can read about it here.

Food Renegade's Raisin Chutney Recipe. I plan to try this one, it looks really good!

Cultures For Health has a compilation of lacto fermented condiment recipes, I'll be trying some of these!

This is just the tip of the ice burg, I hope you found these links helpful, I will update from time to time when I come across more great, informative articles.

Tuesday, March 8, 2011

A new love...


No, I have not fallen out of love with my Hunny (and I never will for that matter), I'm speaking of a new gluten-free product I just tried and am in love with! You may or may not have had it before, it's Rudi's Gluten-Free Bakery Cinnamon Raisin bread!

Here are some of the reason's I love this bread...

1. It's got cinnamon and raisins in it...nuff said :)
2. It is soy free...yippee
3. It's gluten-free
4. It's not too sweet at all, in fact most of the sweetness is from the raisins.
5. The crust gets nice and crunchy when toasted.
6. My local health food store carries it!!

My local health food store also carries the regular Rudi's bread and I will be trying that next, I have high hopes that it will be delicious too!

Have you tried any of Rudi's Gluten-Free Bakery breads? If so, what did you think?

Aiden's face says it all...yum :)

Wednesday, November 24, 2010

Pumpkin Chocolate Chip Cookies!

I am thankful for God and his Son and his perfect plan of salvation, for all the blessings he has bestowed upon me and my family, for his love, guidance and protection and that his love and mercy is boundless!

May you all have a wonderful, happy, cozy, healthy Thanksgiving full of laughter and delicious food with your loved ones!

Here is a yummy cookie recipe...

Pumpkin Chocolate Chip Cookies (adapted from a recipe by George Duran of the Food Network)


1 C. (2 sticks) of butter, unsalted, softened
1 C. white sugar
1 C. light brown sugar (I used 1 1/4 C. of Palm/Coconut sugar)
2 Large eggs
1 tsp. of vanilla extract
1 can (15 oz) or 1 1/2 C. of pureed pumpkin
3 C. of gluten-free all purpose flour blend ( I used Namaste Perfect Flour Blend)
2 tsp. of baking soda
1/2 tsp. of salt
1/2 - 1 tsp. of cinnamon
1 1/2 tsp. of pumpkin pie spice (or only 1 if you like the spice flavor more subdued)
2 C. of gluten-free chocolate chips (milk chocolate is recommended by George Duran, but I used semi sweet)
Parchment paper

Heat oven to 350 degrees. Line cookie sheet(s) with parchment or spray with non-stick spray.

Using a mixer, beat butter until smooth. Beat in the white and brown sugars, a little at a time, until the mixture is light and fluffy (may not happen with the palm/coconut sugar and that's OK). Beat in the eggs one at a time, then mix in vanilla and pumpkin puree. In a large bowl, whisk together the flour, baking soda, salt, cinnamon and pumpkin pie spice. Slowly beat the flour mixture into the batter. Stir in the chocolate chips. Scoop the cookie dough by heaping tablespoons onto the prepared cookie sheet(s) and bake for 11 to 17 minutes or until cookies are browned around the edges. Let cool for 2 minutes, then transfer to wire rack with a spatula.

These are very light and airy and cake like, not your usual crisp cookie...very delicious!! I'd love to hear what you think of them!


Wednesday, November 17, 2010

Dung Balls! (Chocolate Peanut Butter Balls)

Sorry for the title, I hope it didn't cause you to lose your appetite, my younger son took one look at these delicious balls and proceeded to tell me they looked like dung balls so I couldn't resist ;-)


I love the show "The Biggest Loser" it is so inspiring watching those people work their rears off to get healthier. I know It really encourages me to get off my own rear and eat better too! I'm not a fan of low fat (unless it is naturally low in fat) or non fat foods, I believe whole foods are the best way to go. I also do not use artificial sweeteners like Splenda, so I'm leery of the cookbooks that are put out by "The Biggest Loser". I came across their newest cookbook "The Biggest Loser Dessert Cookbook" and found the recipes in it quite versatile, meaning I can sub the non fat or low fat dairy products and whatnot with their whole fat, whole food counterparts quite easily. Devon Alexander is at her best in this one!

Here is one of the recipes from the book that I have tried and love...

Chocolate Peanut Butter Balls by Devon Alexander in "The Biggest Loser Dessert Cookbook"

1/2 C. + 2 TBSP of Old Fashioned Oats ( I used Gluten-Free Oats by Bob's Red Mill)
2 TBSP of honey
2 TBSP of unsweetened cocoa powder
1 TBSP of all-natural creamy peanut butter

Add oats, honey, cocoa powder, and peanut butter to a medium mixing bowl. Using an electric mixer fitted with beaters, mix until well combined. Lay a large square of wax paper on a cutting board or flat work surface. Using your hands, divide the mixture into equal portions (the mixture will be sticky), and place on the paper. Roll each portion into a ball. Serve immediately or store on the counter top in a resealable container for up to 3 days.

Steph's Tips: I recommend doubling or tripling the recipe (after you have made them and like them first). If you do this, then put the ingredients in a Kitchenaid type mixer otherwise using the mixer and beaters will make the mixture fly out all over the counter. Instead of dividing the mixture into equal portions, I just pull a small amount out and roll into balls and place on the wax paper.

Also you can use almond, sunbutter or any other nut butter you love in place of the peanut butter.

My husband would like to add a decorating tip...he thought it would be fun to add plastic dung beetles around the table top or around the dish containing the balls...cute huh?!


Don't worry they are far from tasting like dung ;-)

Saturday, August 21, 2010

Roasted Vegetables


I have been on a roasted vegetable jag this past week, it's a delicious way to get more vegetables into my diet. It's also a tasty way to use up any vegetables you have laying around so they don't go to waste. The best combination in my opinion is:

Potatoes or sweet potatoes
Carrots (I like baby carrots, no chopping required)
Red Onion (you can use any onion you like, red onions are my favorite)
Broccoli (optional, but so delicious when roasted)
Beets (optional, so full of fiber and delicious!)

Preheat oven to 400 degrees. In a medium or large bowl, depending on how much you are making, add your vegetables after you have peeled and chopped them (peeling is not absolutely necessary). When all the vegetables have been added to the bowl, drizzle olive oil (enough to coat) over them, then drizzle some balsamic vinegar as well. Add plenty of salt (several good size pinches depending on how much you are roasting) and some pepper. With your hands mix them all together to coat evenly. Have a baking sheet nearby covered with some parchment paper, pour onto parchment and spread out evenly. Bake for 20-30 min. depending on how much you are roasting. After 20-30 min. take out baking sheet and with spatula, mix the vegetables around a little, then put back in oven for another 20 min., they should look nice and caramelized and smell wonderful!

I love the savory, sweet flavors, it makes me feel all warm and happy inside...perfect comfort food! I would love to hear what some of your favorite combinations of veggies to roast are!


Saturday, August 14, 2010

Delicious, healthy toppings for your yogurt.

Now that you've made some crock pot yogurt or you have some of your favorite plain store bought yogurt, what do you do with it? Good news, your options are boundless! Here are some of my ideas that you may find tempting...

1. Sweetener- I have found liquid types like raw or regular honey, agave and liquid stevia to be best for yogurt since they blend well and keep the yogurt texture nice and creamy. Granulated sugars will be gritty, however stevia powder may work. I personally like NuNaturals Pure Liquid Vanilla Stevia (can be found online at iherb or in certain health food stores), it has a very nice vanilla flavor and is not bitter.

2. Fruit- Any fresh or frozen fruit can be a topping for your yogurt. If you have some fresh strawberries (if frozen set them out to thaw for a bit) put a cup of them in your food processor and pulse a few times if you like them chunky or longer if you want a nice, smooth puree. Add some honey, agave or stevia to sweeten the strawberries to your liking then add to your yogurt. Fruits like raspberries or blackberries have seeds that can bother your teeth, so puree them in your food processor or blender then strain the juice through a fine mesh wire strainer.

3. Essential Oils- Adding pure, food grade Essential oils can be a delicious and healthy way of flavoring your yogurt. I would only flavor the amount you will be eating right away, as EO's are naturally anti-bacterial and may effect the beneficial bacteria of your yogurt. Lemon and Orange are wonderful flavors...and I recommend using Young Living's pure, food grade EO's, they can be found on my Young Living website.

4. Nuts-Using your favorite nuts as a topping, adds a wonderful crunch and a pleasing, tasty layer of texture as well as a source of beneficial, heart-healthy fats.

Here are a couple of my recipes to get you started...

Baked Cinnamon Apples

Organic Braeburn Apples (or your favorite kind)
Hormone free butter
Cinnamon sugar (see recipe for this here)

Preheat your oven to 400 Degrees. Use 1 TBSP of butter for each regular size apple, if using small apples like I did, use a approx. 1/2 TBSP of butter for each one. Use a TBSP of Cinnamon Sugar for each regular size apple and only 1/2 TBSP for the small ones.


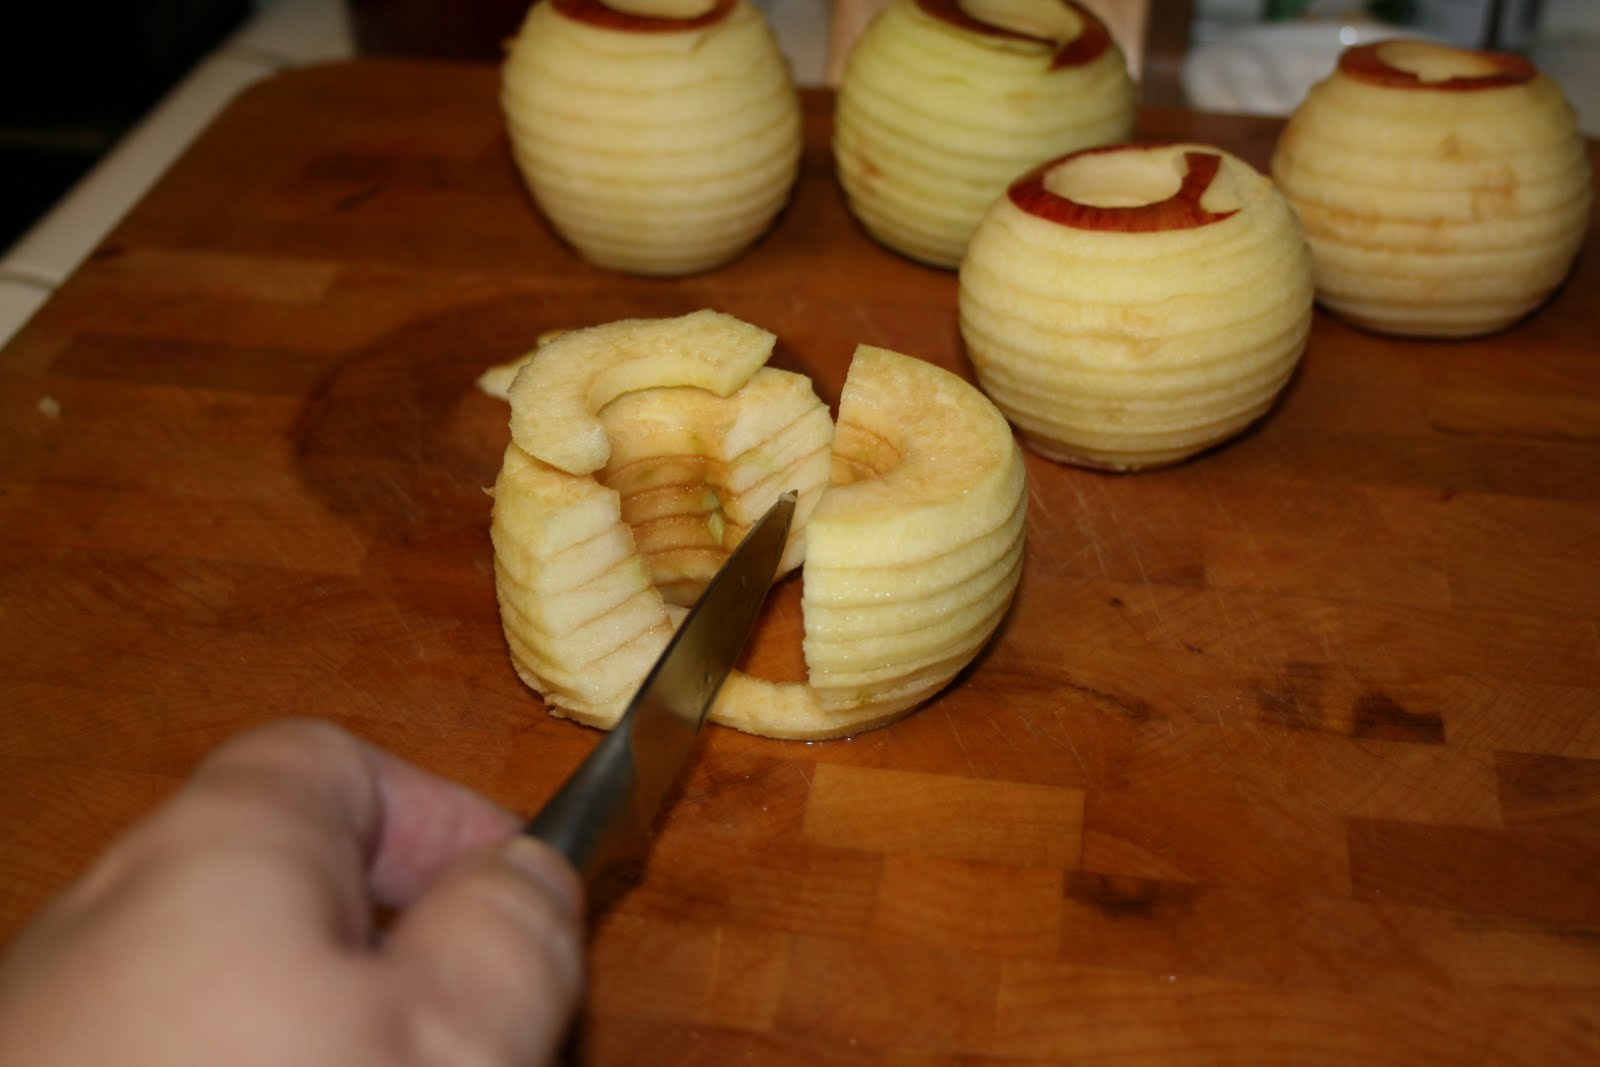
Peel and slice your apples in thin slices, here I'm using my Apple, Corer, Peeler, Slicer...love it! You'll end up with these little, cored out, spiral sliced apples.


Slice them in half and you'll end up with crescent shaped apple slices...perfect!


Put all your apple slices in a bowl and melt your butter either on the stove or in the microwave for approx. 30 seconds. Pour melted butter over the slices as my oldest son is demonstrating here.


Sprinkle your Cinnamon Sugar over the buttered apple slices. My daughter is helping her Mommy with that.


Here is my younger son mixing it all together. Are you detecting a trend? Yep, this is perfect for kids to help make, it's fun and tasty!


Pour the contents of the bowl in a 13" x 9" baking pan. No need to butter the pan! Place in preheated oven and bake for 20 minutes, take out the pan, stir the apples and put back into oven. Bake for another 20 minutes.


Stick a sharp knife into apples to test for tenderness, if they pierce easily then the apples are done. Let sit and cool on the counter top, then...


top your sweetened yogurt with it...you could add some nuts on top as well.

Blackberry Sauce

2 C. fresh or frozen blackberries
Your favorite sweetener ( I used 5 drops of NuNaturals Vanilla Stevia liquid)

Put blackberries in food processor or blender and blend till you have blackberry puree. Place a fine mesh strainer over a bowl and pour your puree into the strainer. Using the back of a spoon, smoosh the puree through the strainer till all you have left is seeds...and there will be a lot of seeds! Add your sweetener to the blackberry sauce, adjusting as needed to your taste.


Spoon over yogurt, ice cream, oatmeal, etc...

Your taste buds will thank you, your body will thank you, your family will thank you...need I say more ;-)

What are some of your topping ideas?

Friday, August 13, 2010

Yes, You Can Make Yogurt In The Crock pot!


I first learned about making yogurt in the crock pot from Stephanie O'Dea's blog A Year of Slow Cooking, she had tried the recipe and said it was great, so I decided to try my hand at it and was pleasantly surprised at how easy and inexpensive it was to make homemade yogurt without buying any special yogurt equipment. This is my third time around, so while I am not a pro, I am pretty comfortable with the routine and have had nothing but successes! Here is the link to the original recipe from Stephanie's website How to make Yogurt in the Slow Cooker 

I have taken some pictures and documented the process. As you will see it's extremely easy to make, just takes a bit of time...


Crock pot Yogurt

1/2 Gallon of Organic Whole Milk (or at least hormone free milk like Alta Dena)
1/2 C. of plain or vanilla yogurt (the vanilla won't change the flavor much) must contain live/active cultures


Poor the cold milk into your crock pot and turn it on low, let it cook on low for 2 1/2 hours.

After cooking it on low for 2 1/2 hours, turn off your crock pot and unplug it. Keep the cover on your crock pot, and let the milk sit for 3 hours. Let your store bought yogurt sit on the counter and come to room temp for the last hour.


After letting the milk sit for 3 hours, scoop out 2 cups of the warm milk into a medium bowl, add the 1/2 C. of store bought yogurt and whisk into the warm milk. Pour it all back into your crock pot and briefly whisk it all together. Put the lid back on your crock pot and cover it completely with two heavy bath towels for insulation. Let it sit undisturbed for 8 hours.


After 8 hours, take off the towels and the lid, and check your yogurt, it will be thickened but still a bit watery. Take a large, fine, mesh colander and line it with cheese cloth or even paper towels (mine were plain white) and place over a large bowl, pour the yogurt into the colander and let the excess liquid drain overnight in the fridge or a day and a half as I did in this case. Draining overnight or for 8 hours will result in thick and creamy yogurt, letting it sit longer makes yogurt cheese...yum!


A lot of liquid gets drained out and results in...


this thick and creamy deliciousness!

I love that it is essentially a blank slate that can be sweetened and topped with whatever tickles your fancy at the moment. I have found that liquid type sweeteners are best as granulated sugar does not dissolve well and will taste gritty. Honey, agave and liquid stevia are great! Stay tuned...tomorrow's post is all about toppings and my recipe for Baked Cinnamon Apples!