

I want to share with you all the recipe for the best gluten free bread we have had, and I have bought and made many loaves...trust me! But first here is some history on how I came to find this treasure of a recipe. About a year and half ago, I asked my husband if we could have a gluten free household to avoid cross contamination and to help me stay gluten free. Luckily he agreed, because that is the sweet, hunky kinda guy he is and he wanted me to succeed in my attempt to get healthy. Well, in our family, we like sandwiches, they are easy to make and fairly inexpensive...that is if you don't eat gluten free. I found some gluten free sandwich bread cookbooks and made some of the recipes, the results were pretty good, not wonderful though. We also purchased some store bought breads and found we liked Udi's and Rudi's the best, but sometimes both would end up being dry, not to mention expensive. I decided to Google "Udi's bread recipe" and came across this blog, Extraordinary Life: On the road to joyful cooking, she had a recipe called Udi's white bread copycat recipe. I loved how her recipe was so detailed, and the instructions easy to understand. The comments on this recipe was also full of great tips (I urge you to read them if you plan to make this bread). The first time I made this bread, we were in love, sandwiches were tasty and enjoyable again...and guess what, it tasted waaaay better than Udi's (sorry Udi's) not to mention soft and not dry (of course it's not as soft as Webers bread, that stuff is more air than anything anyway).
Fast forward a year or so and I have made quite possibly a hundred loaves of this bread, and have not had any flops! I have also started using a scale to weigh my flours. I have found two benefits to this (that I can think of, could be more) one, it gives consistent bread results, two, it saves you money from using more flour than you need. Don't worry if you don't have a scale, the original recipe contains the measurements in cups.
I have reproduced this recipe on my blog with permission from Lisa @ Extraordinry Life. I have experimented with and created the gram conversions for those that weigh their ingredients like I do, here's the converstion for you.
1 Loaf
120 g Tapioca flour
119 g Brown Rice flour
48 g Potato Starch (not Potato flour)
2 Tbsp oil
2 Tbsp sugar
3 egg whites
1 pkg or 2 1/2 tsp of dry active yeast (she says rapid rise yeast, but I have always used dry active with no problems)
2 tsp xanthan gum
1 tsp salt
1 tsp baking powder
1/2 tsp vinegar
3/4 cup warm water
Preheat oven to 170 degrees. Once preheated, turn oven off.
Lightly grease on 8 x 4 bread pan. (Albertson's sells Good Cook non stick 8 x 4 pans, I have two of them)
*Grease pan with butter or vegetable shortening.
*In a medium sized bowl, weigh out your flours.
*Add into flours, xanthan gum, salt, baking powder, stir carefully with a whisk or spoon to combine.
*Add water, oil, sugar, yeast into a small bowl or measuring cup and mix until combined.
*Allow water to sit while yeast starts to get foamy.
*Meanwhile, in a kitchenaid type mixer with whip cream attachment, whip egg whites for approx. 1 minute or until it develops soft peak.
*Add vinegar to egg whites and whip for a few seconds.
*Add yeast mixture to the egg whites in the mixer.
*Turn mixer on lowest setting and spoon flour into the egg whites, then turn mixer on to a medium setting and whip the batter for 3 minutes.
*With a spatula, spoon dough into pan and flatten as best you can with back of spatula.
*Put pan in oven and leave to rise for 30 min.
*When 30 min. is up, turn oven on to 350 (keep pan inside) and bake for 70-72 min.
*Take out of oven and turn out of pan, let cool completely before slicing or bread will fall flat and have a different texture. Letting cool completely is key...hard I know, but be patient :)
*Slice with serrated knife and enjoy!
2 Loaf Recipe:
240 g Tapioca flour
237 g Brown Rice flour
96 g Potato Starch (not Potato flour)
4 Tbsp oil
4 Tbsp sugar
6 egg whites
2 pkg or 5 tsps of dry active yeast (she says rapid rise yeast, but I have always used dry active with no problems)
4 tsp xanthan gum
2 tsp salt
2 tsp baking powder
1 tsp vinegar
1 1/2 cups warm water
Same instructions as above!
 |
| Fresh out of the oven! |
 |
| Beautiful loaves. |
 |
| Great texture, not to mention yummy! |
 |
| The one loaf recipe will make 6 hamburger buns. |
 |
| I have two boys (ok three if you count my Hubby) so I used the two loaf recipe to get 12 buns. |
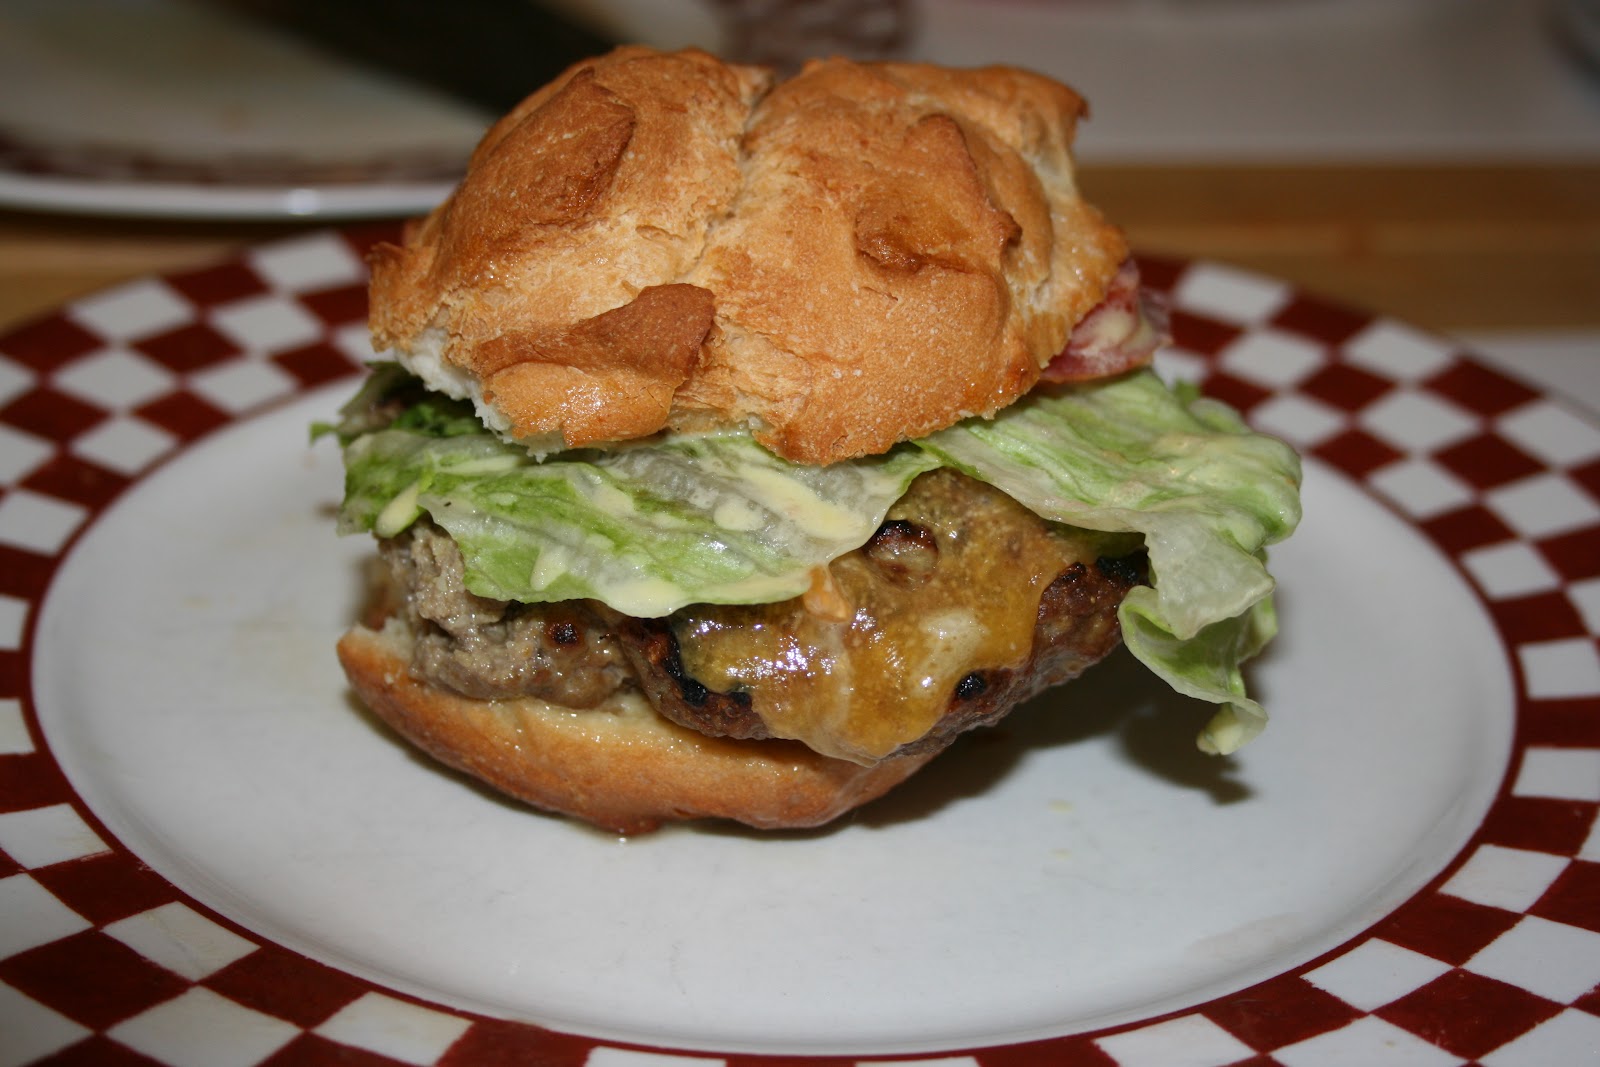 |
| My Hubby made 1/2 lb. burgers lol, but boy were they good! |

Costco has at this time a great deal on dry active yeast, it looks like a large block of yeast that you will have to chisel pieces off (had an argument with hunny as I did not want to have to break off chunks of yeast lol, but he won out because it is so much cheaper than at the regular store), but when you open it, the yeast is completely granulated and ready to use...so glad I gave in to my hunny!
Now on to the next bit of news...
I am going to do another 21 Day Sugar Detox on Monday, May 28th - June 18th.
After successfully completing the last one, I can feel myself falling back into my old habits, cravings are coming back and the control I thought I had is slipping away. I've made some huge improvements in my health, my thyroid medication has been lowered significantly and I don't want to go back, I need to move forward...so BRING IT ON! I can do this again, you betcha!
Anyone want to join me? You've got a week to gear up emotionally and physically...you can do it!!
You can choose:
1. Just get the sugar out in all it's forms, click here for a list of 50 different names for sugar. Read labels carefully, you'll be surprised, it's in many things!
2. Get all forms of sugar out and not eat anything sweet, including fruit and stevia, splenda or other non-caloric sweeteners. Studies show that for certain people, just eating something that tastes sweet even though there is no sugar, their bodies will release insulin causing fat storage.
3. You can follow the 21 Day Sugar Detox program by Balanced Bites. This program costs $21 is full of information and recipes, check it out.
So who is with me? We can encourage and support each other!
Steph
Makes me smile to read your lovely intro. Glad your family is enjoying the bread!
ReplyDeleteLisa @
Extraordinary Life
Thanks for dropping by Lisa, yes, we are very much enjoying your bread recipe, thanks so much for creating it! I hope you see my update to this post, I made hamburger buns out of the dough...so good!
ReplyDeleteSteph
I am looking right now, great work! Our Buns are the best stuff on earth. ;-).
DeleteLisa @
Extraordinary Life
This looks awesome! I'll definitely try it. How do you store the bread after it's cooled and sliced? It it's in an airtight container on the counter will it mold?
ReplyDeleteI wait till the bread has been cooled down completely and store in large freezer bags. I have found that it will last at least 3 days at room temp. but longer in the fridge. We usually have it eaten before day 3 though :-)
ReplyDeleteSteph
The bread looks lovely. So glad your hubby agreed to a gluten free household, it makesthings so much easier!
ReplyDeleteThank you, yes it really does make things so much easier and I don't have to worry about cross contamination taking place. All the more reason to make sure the gluten free foods I serve taste delicious :)
ReplyDeleteSteph
When do you add the yeast mixture back in? I couldn't find that in your recipe. :( I added it with the vinegar after whipping the egg whites. Was that right?
ReplyDeleteYes, you add the yeast mixture after you are done whipping the egg whites and have added the vinegar. I'm so sorry for leaving that out of the instructions! I will add it in there, thank you for pointing that out to me and I hope your bread came out nicely despite my error.
ReplyDeleteThanks for giving variety bread recipe. I like this recipe and it is a very attractive and looking good.
ReplyDeleteThank you, all credit goes to Lisa of Extraoridnary Life, it's her amazing recipe! I hope you will find it delicious too!
ReplyDeleteSteph
hanks for sharing this information. It is a useable information. This is a nice and good blog.
ReplyDeletesugar detox